
10 Solar Installation Tips for Global Buyers?
A solar installation can appear straightforward in a brochure: panels, an inverter, and a neat row of figures. Real projects are less tidy. Global buyers must compare roof conditions, sunlight patterns, equipment compatibility, shipping timelines, warranties, and installer credentials. A bright afternoon does not reveal seasonal shade. A product datasheet cannot confirm that a roof is structurally suitable. Small details matter.
Energy expert Amory Lovins is often quoted as saying, “The cheapest energy is the energy you don’t use.” That idea belongs in solar planning, too. Before choosing system size, buyers should understand their energy use and consider practical efficiency improvements. This guide presents ten solar installation tips, from reviewing site conditions and comparing equipment to checking maintenance plans and asking clear questions about costs. It also explains why local technical requirements and qualified professional advice matter, since product standards and grid conditions vary by location. No checklist removes every surprise. A careful plan can still miss a shaded vent or a delayed shipment; that is worth admitting. Use these tips to compare proposals thoughtfully, not to treat any single quote as a guarantee. The strongest decision is usually the one supported by site-specific evidence, understandable documentation, and realistic expectations.
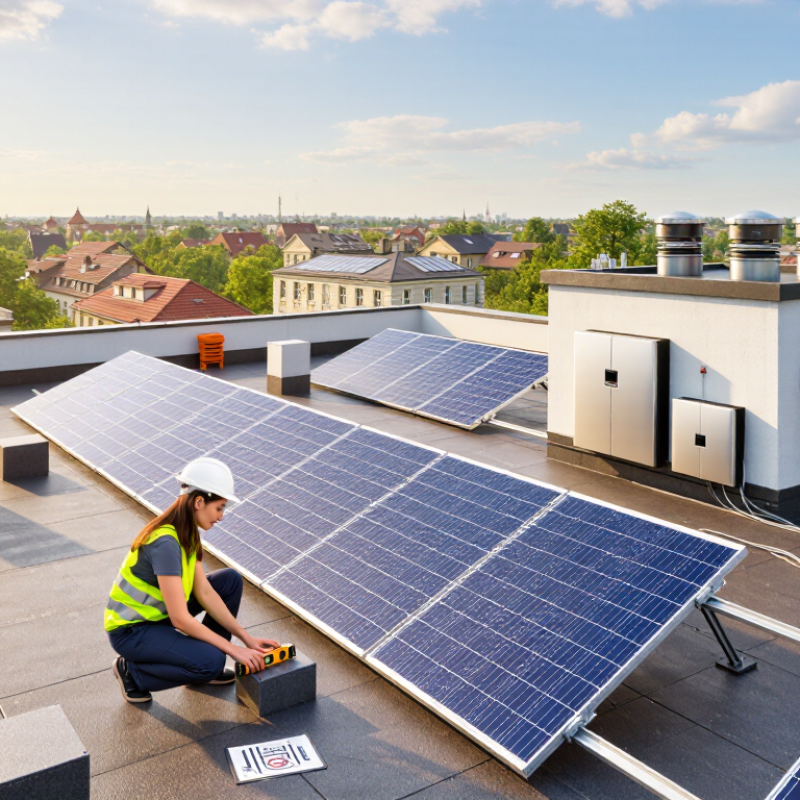
Assess Solar Resource, Roof Condition, Shading, and Local Climate
Solar output depends on more than a country’s annual sunshine figures. Ask for monthly solar-resource data for the exact site, including seasonal cloud cover and likely production changes. A sunny region can still have weak winter output. Compare estimates with local weather records, not just a single annual average.
Inspect the roof before choosing a system size. Look for cracked tiles, corrosion, loose fasteners, and signs of water intrusion. Check the roof’s age and expected repair schedule; panels may remain in place for decades. A structural professional can assess whether the roof can safely carry the added load. Small defects matter.
Shading deserves a close, practical review. A chimney, nearby tree, or neighboring building can cast a narrow shadow across panels at key hours. Ask for a shade assessment across different seasons, since the sun’s path changes. Local climate also affects equipment choices: high heat can reduce panel output, while wind, snow, salt air, or dust may require suitable mounting and maintenance plans. Details are easy to overlook. I would not treat a generic online estimate as a site survey; it cannot see a damaged rafter or next summer’s growing tree.
| Tip | What to assess | Practical indicator | Recommended action |
|---|---|---|---|
| 1. Check the solar resource | Estimate the site’s solar irradiation and expected system output, accounting for location, orientation, tilt, and system losses. | Use location-specific monthly and annual irradiation data; nearby sites can have different results because of terrain and weather. | Request an energy-yield estimate based on the exact installation location and stated assumptions, rather than relying on a country-wide average. |
| 2. Inspect roof condition | Review the roof covering, structure, waterproofing, and any signs of leaks, corrosion, or damage. | Solar equipment commonly remains in service for decades, so a roof nearing the end of its useful life may need work first. | Have a qualified professional assess the roof and complete necessary repairs or replacement before installation. |
| 3. Evaluate shading | Identify shade from trees, chimneys, parapets, neighboring buildings, and other obstructions throughout the year. | Shade changes with the sun’s seasonal path; a single midday inspection does not show annual shading conditions. | Request a shade study that considers the sun path and nearby obstructions, and compare layout options that reduce shade impacts. |
| 4. Match the design to local climate | Consider high and low temperatures, humidity, rainfall, wind, snow, and coastal salt exposure. | Module output varies with operating temperature, while wind, snow, moisture, and salt can affect equipment selection and installation design. | Check equipment datasheets and ensure the design follows local building and electrical requirements for the site conditions. |
| 5. Verify roof orientation and usable area | Measure the available roof planes and check their direction, tilt, access paths, and obstructions. | The best array layout depends on the hemisphere, roof geometry, local sun path, and project goals. | Ask for a dimensioned layout showing module positions, setbacks, maintenance access, and any areas excluded from installation. |
| 6. Confirm structural capacity | Assess whether the roof can support the system’s added dead load and relevant wind or snow forces. | Structural requirements differ by building, mounting method, and local design codes. | Obtain a site-specific structural review where required, especially for older buildings or roofs with visible damage. |
| 7. Check local permits and grid rules | Identify planning approvals, building and electrical permits, utility interconnection rules, and export limits. | Requirements and compensation for exported electricity vary by jurisdiction and utility. | Confirm approvals, application steps, fees, and interconnection conditions with the relevant local authorities and utility before purchasing equipment. |
| 8. Size the system to energy use | Review electricity bills, seasonal demand, expected future loads, and the value of self-consumed versus exported power. | A system’s suitable size depends on consumption patterns and local billing rules, not just the roof’s maximum capacity. | Base the proposed system size on documented usage and explain the assumptions behind estimated generation and savings. |
| 9. Plan for maintenance and access | Consider safe access to the array, cleaning needs, drainage, vegetation growth, and service access to electrical equipment. | Dust, pollen, bird debris, and rainfall patterns can affect cleaning needs; safe maintenance access should be planned from the start. | Ask for an operations and maintenance plan that identifies inspection needs, safe access, and how faults can be monitored. |
| 10. Review warranties and system documentation | Compare product and workmanship warranty terms, exclusions, service arrangements, and the documents supplied at handover. | Warranty coverage, duration, and claim procedures vary by product, installer, and country. | Obtain written warranty terms, equipment datasheets, electrical diagrams, permits, and commissioning records before final acceptance. |
Related Posts
-

What is Solar System Installation? Unlocking the Key Components and Benefits for Your Home
-
Uncompromising Quality in Solar Solutions: China’s Leading Manufacturing for Global Supply
-

Ultimate Guide to Mastering Home Solar Installation Techniques for Beginners
-
Top 10 Tips for Successful Solar Panel Installation at Home?
-
2026 Best Type of Solar Energy Panels for Home?
-
What Is a Solar Plate and How Does It Work?